
JavaScript Loops Explained in Simple Words
A warm beginner-friendly story guide to JavaScript loops, explaining for, while, do while, break, continue, nested loops, and infinite loops in simple words.
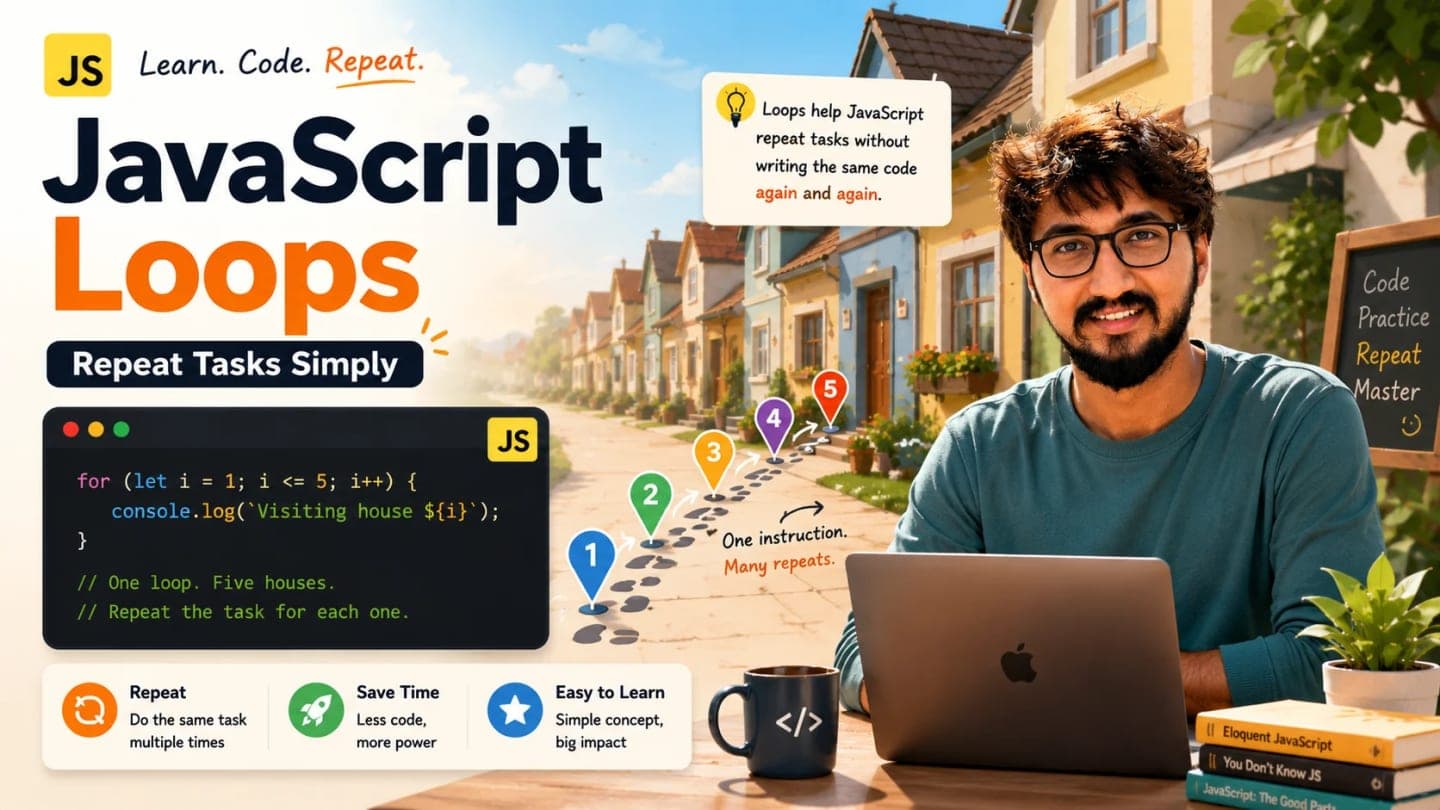
Loops help JavaScript repeat a clear task without making the code noisy.
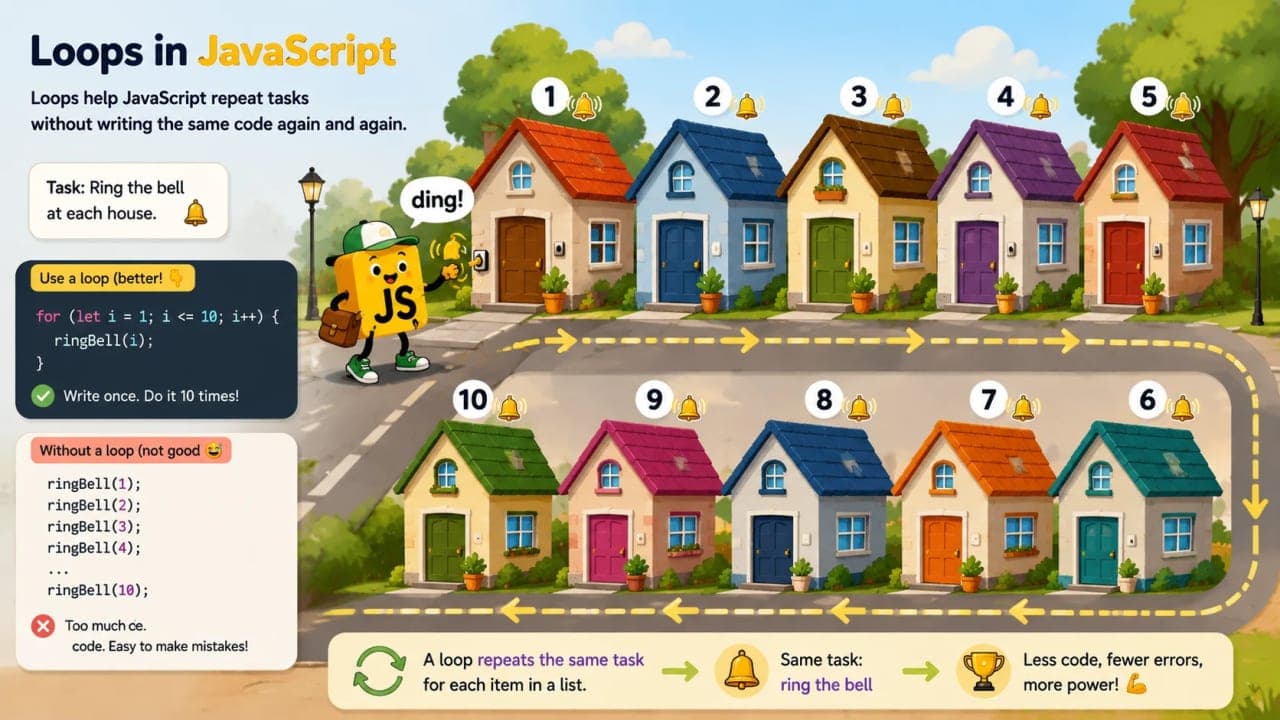
Imagine there is a small street with 10 houses. Someone gives you one job: ring the bell of every house.
One way is to write the instruction 10 times. Ring the bell at house 1. Ring the bell at house 2. Ring the bell at house 3. Keep going like that until house 10.
That works, but it already feels boring. Now imagine the street has 100 houses. Or 1,000. Suddenly, writing every instruction separately becomes painful.
A smarter instruction would be: start from house 1, go till house 10, and ring the bell at each house.
That, in a very simple way, is what loops help JavaScript do. A loop tells JavaScript, "Repeat this task again and again until I tell you to stop."
If you are new to programming, loops may feel strange at first because the code seems to move in circles. But once you understand three ideas - where to start, when to stop, and what to do each time - loops become one of the most useful tools in JavaScript.
What Is a Loop in JavaScript?
A loop is a way to repeat a block of code multiple times.
That block can be anything simple: printing a message, checking a name, counting numbers, going through a list, or doing the same small task for every item.
You already understand loops in real life. When you walk through every item in a shopping list, you are repeating the same action: check item, move to next item. When a teacher checks attendance, they repeat: read name, mark present or absent, move to next student. When you climb stairs, you repeat: lift foot, step up, move to the next step.
JavaScript loops work with the same idea.
for (let count = 1; count <= 5; count++) {
  console.log("Hello");
}
This loop prints Hello five times. Let us slow it down.
let count = 1 means the counting starts from 1.
count <= 5 means keep running while count is less than or equal to 5.
count++ means increase count by 1 after every round.
console.log("Hello") is the instruction that gets repeated.
So JavaScript starts at 1, prints Hello, increases the count, checks again, prints again, and continues until the count reaches 5. After that, the loop stops.
Why Do We Need Loops?
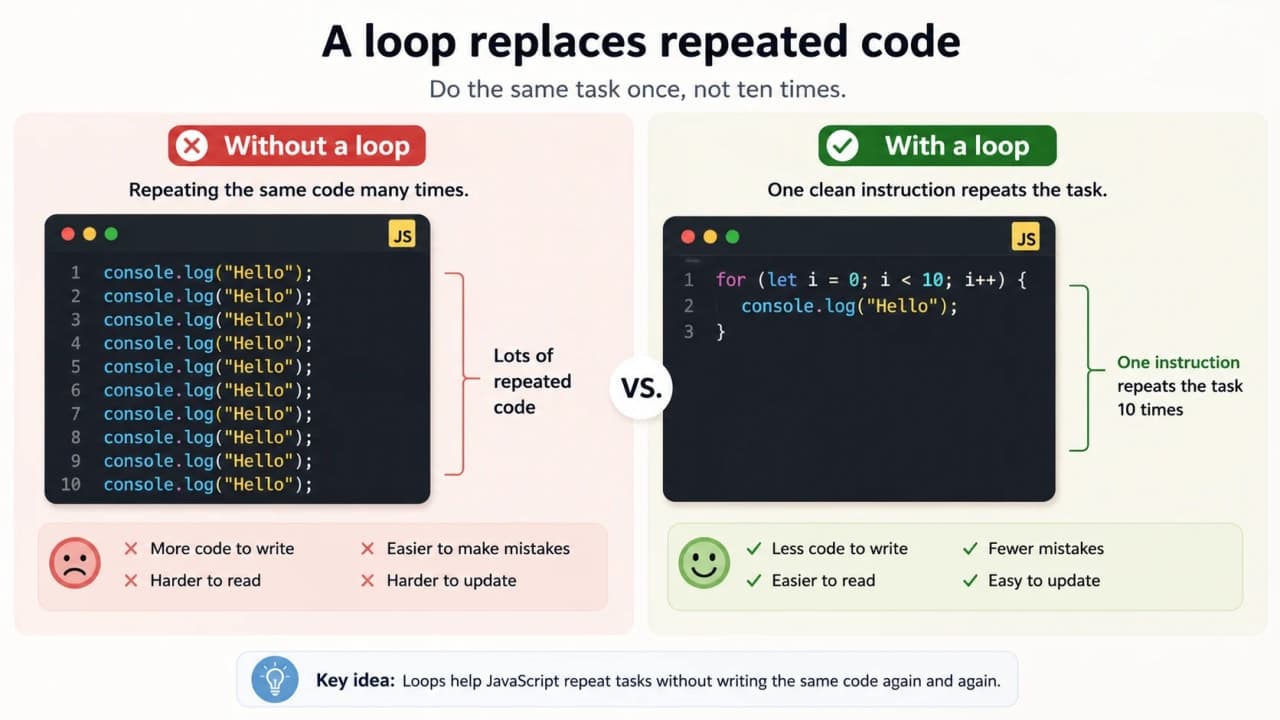
Before loops, let us look at the problem they solve. Suppose you want to print Hello five times. Without a loop, you may write this:
console.log("Hello");
console.log("Hello");
console.log("Hello");
console.log("Hello");
console.log("Hello");
For five lines, this is still manageable. But what if you need to do it 100 times? What if you need to check 1,000 records? What if you need to go through every item in a list?
That is when repeated code becomes messy. It becomes long, boring, and easy to make mistakes in.
A loop turns the same idea into this:
for (let i = 1; i <= 5; i++) {
  console.log("Hello");
}
Much cleaner. If you want to print Hello 10 times, you change 5 to 10. If you want 100 times, change it to 100.
Loops make code shorter, cleaner, easier to change, and less repetitive. That is the main reason they exist.
Understanding the for Loop
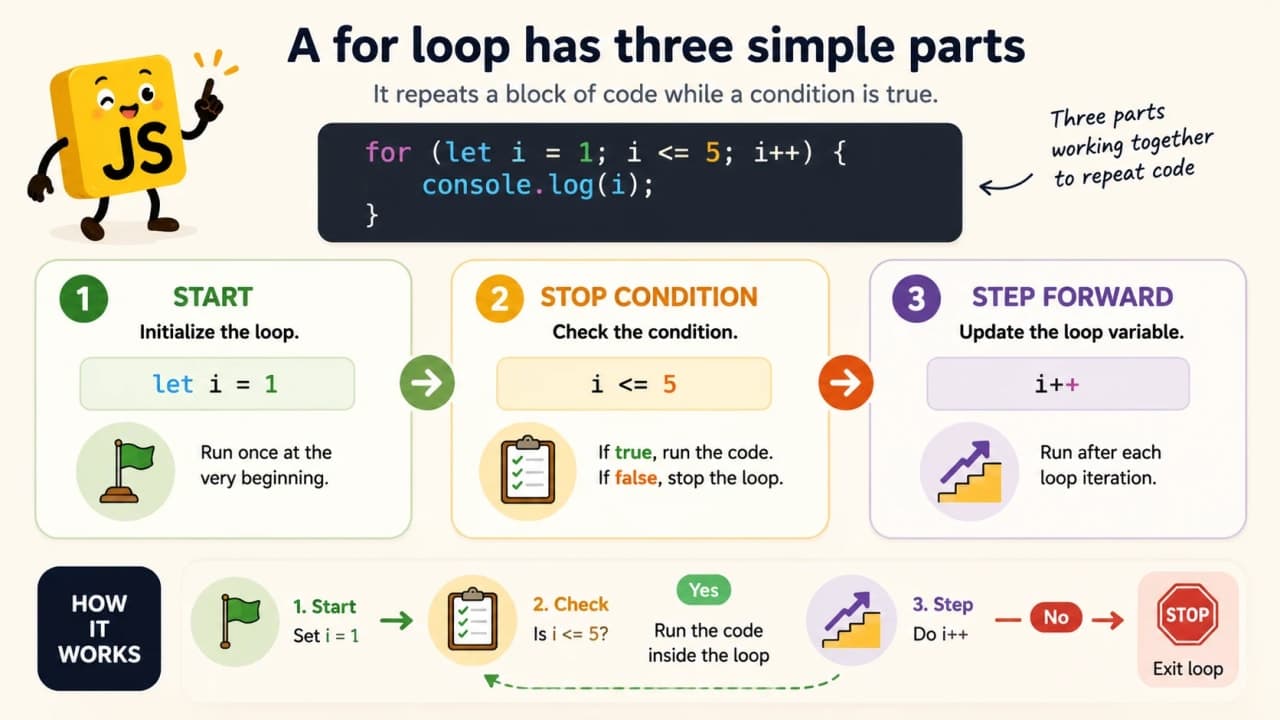
A for loop is useful when you already know how many times you want to repeat something.
Think of a school teacher checking roll numbers from 1 to 10. The teacher knows where to start, where to stop, and how to move forward.
A for loop also has these three parts:
Where to start
When to stop
How to move forward
for (let rollNumber = 1; rollNumber <= 10; rollNumber++) {
  console.log("Checking student roll number:", rollNumber);
}
Here, rollNumber starts at 1. The loop continues while rollNumber is less than or equal to 10. After every round, rollNumber increases by 1. And every time the loop runs, console.log prints the current roll number.
So the loop behaves like a patient teacher: checking roll number 1, then 2, then 3, and so on until 10.
The Small Story Behind i Beginners often ask, "Why do developers always use i in loops?"
Simple answer: i is just a common short name for index or counter. It is not magic. JavaScript does not care whether you call it i, count, number, rollNumber, or step.
for (let i = 1; i <= 3; i++) {
  console.log(i);
}

for (let step = 1; step <= 3; step++) {
  console.log(step);
}
Both examples work. The second one may even feel easier because step sounds like something moving forward.
When you are learning, meaningful names are your friend. Once you become comfortable, you will understand why i is common. But in the beginning, there is no prize for making your code look mysterious.
Looping Through a List
Counting is useful, but loops become even more interesting when we use them with lists.
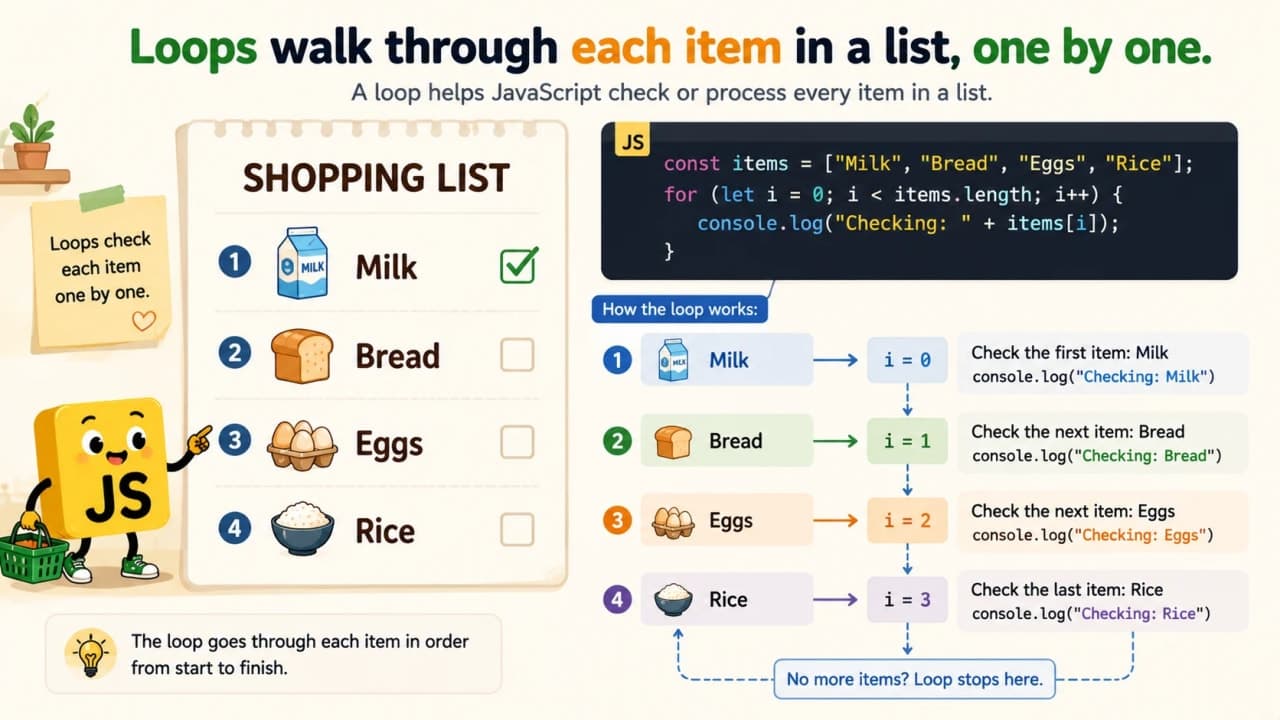
Imagine a shopping list: Milk, Bread, Eggs, Rice. Instead of checking each item manually, JavaScript can walk through the list one item at a time.
const shoppingList = ["Milk", "Bread", "Eggs", "Rice"];

for (let i = 0; i < shoppingList.length; i++) {
  console.log(shoppingList[i]);
}
An array is like a list. In JavaScript, list positions start from 0, not 1. So Milk is at position 0, Bread is at position 1, Eggs is at position 2, and Rice is at position 3.
That is why i starts from 0 here. shoppingList.length tells JavaScript how many items are in the list. shoppingList[i] gives the current item.
So the loop says: start at the first item, keep going while there are items left, and print the current item each time.
Understanding while Loop
A while loop keeps running while a condition is true.
Think of filling a water bottle. You keep filling while the bottle is not full. Or walking home. You keep walking while you have not reached home. Or charging your phone. It keeps charging while the battery is not full.
let battery = 20;

while (battery < 100) {
  console.log("Charging... Battery is now", battery);
  battery = battery + 20;
}

console.log("Battery full");How is it so far?
Vote with other readers
Here, battery starts at 20. The loop runs while battery is less than 100. Inside the loop, battery increases by 20 each time. When battery reaches 100, the condition battery < 100 becomes false, and the loop stops.
The most important thing in a while loop is this: something must change inside the loop. If nothing changes, the loop may never stop. We will talk about that soon.
for Loop vs while Loop
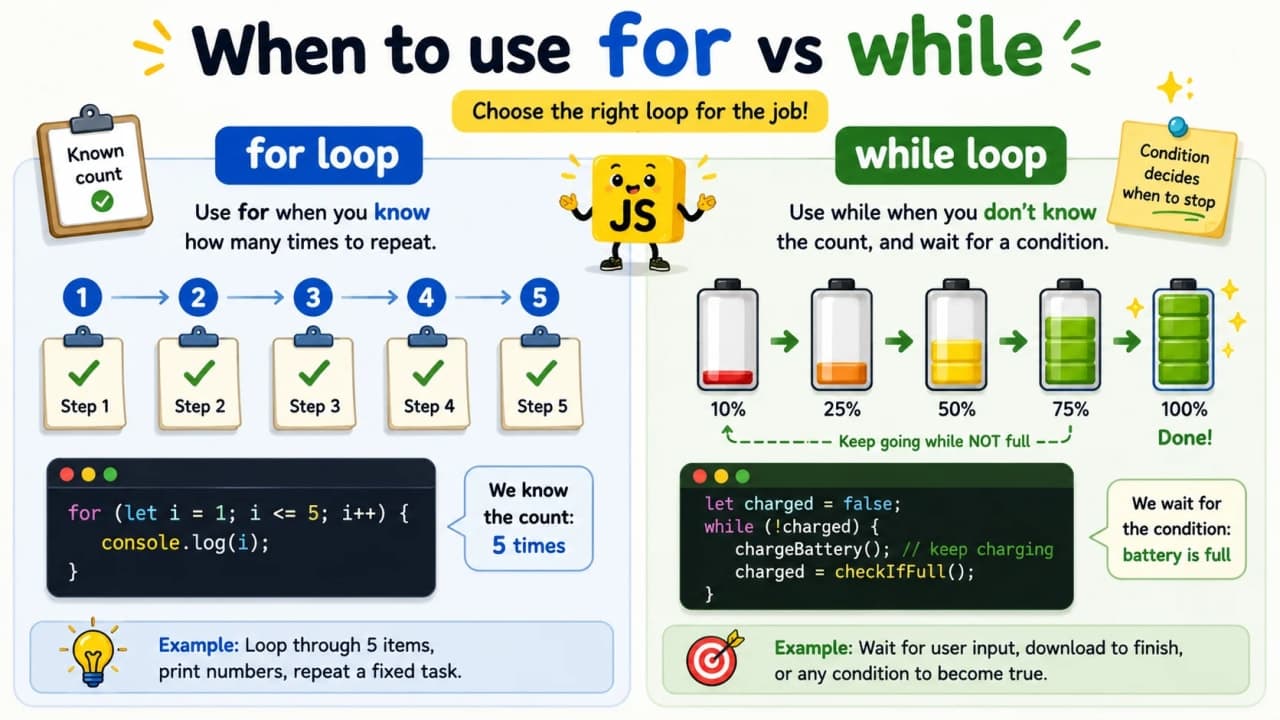
A for loop and a while loop can both repeat code, but they feel useful in different situations.
Use a for loop when you usually know the count. For example, count from 1 to 5.
for (let number = 1; number <= 5; number++) {
  console.log(number);
}
Use a while loop when you want to continue until something becomes true or false. For example, keep charging until the battery is full.
let battery = 20;

while (battery < 100) {
  battery = battery + 20;
  console.log("Battery:", battery);
}
Simple memory trick: for is usually good when you know the journey count. while is good when you are waiting for a condition to change.
Understanding do while Loop
A do while loop is a little different. It runs the code at least once, and then checks the condition.
Imagine tasting tea once before deciding whether it needs more sugar. You try once first. Then you decide whether to continue.
let attempts = 1;

do {
  console.log("Trying to connect... Attempt", attempts);
  attempts++;
} while (attempts <= 3);
The code inside do runs first. After that, JavaScript checks attempts <= 3. This means a do while loop always runs at least once, even if the condition later becomes false.
You may not use do while every day as a beginner, but it is good to know what makes it different.
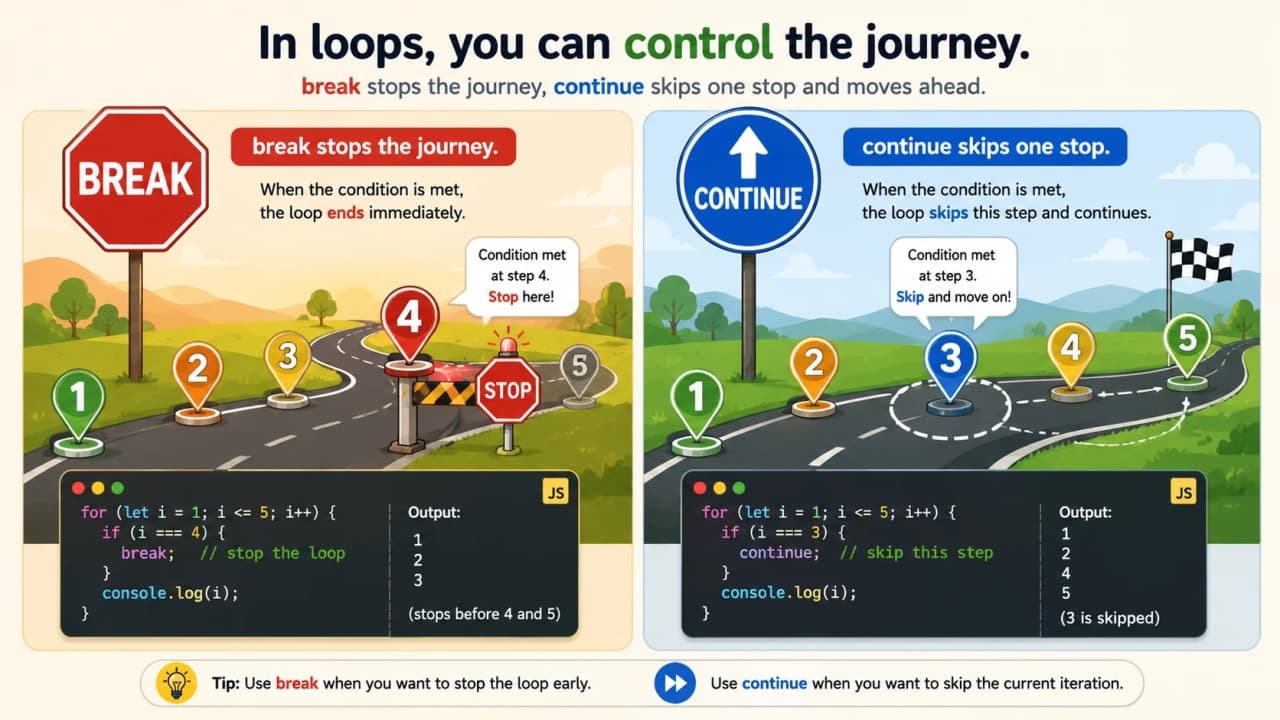
break: Stopping a Loop Early
Sometimes we do not want the loop to complete all rounds. If we find what we were looking for, we stop.
Imagine searching for your keys in different drawers. Once you find the keys, you do not keep searching the remaining drawers for fun. You stop.
const drawers = ["clothes", "books", "keys", "documents"];

for (let i = 0; i < drawers.length; i++) {
  console.log("Checking:", drawers[i]);

  if (drawers[i] === "keys") {
    console.log("Keys found!");
    break;
  }
}
The break keyword stops the loop immediately. It says, "We are done here."
continue: Skipping One Round
continue is different from break. It does not stop the full loop. It only skips the current round and moves to the next one.
Imagine checking fruits in a basket. If one fruit is rotten, you skip it and continue checking the next fruit.
const fruits = ["apple", "banana", "rotten mango", "orange"];

for (let i = 0; i < fruits.length; i++) {
  if (fruits[i] === "rotten mango") {
    continue;
  }

  console.log("Good fruit:", fruits[i]);
}
Here, rotten mango is skipped. The loop does not stop. It simply moves ahead to orange.
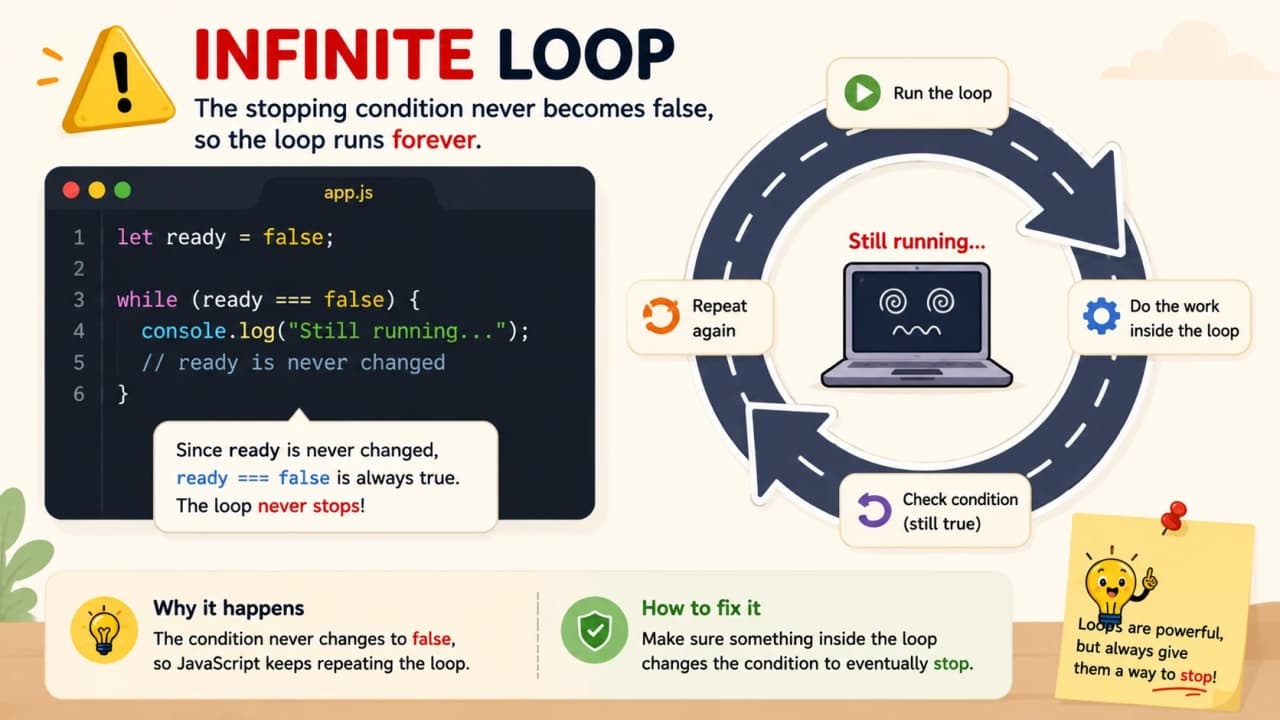
Infinite Loops: The Mistake Every Beginner Should Understand
Now we need to talk about the loop mistake that every beginner should understand early: the infinite loop.
An infinite loop happens when the loop never gets a proper reason to stop. JavaScript becomes like a person stuck in the same thought forever. Same line, same check, same result, again and again.
Here is a bad example:
let number = 1;

while (number <= 5) {
  console.log(number);
}
The problem is that number never changes. It starts at 1, and it stays 1 forever. So number <= 5 always remains true. The loop never ends.
The correct version changes number inside the loop.
let number = 1;

while (number <= 5) {
  console.log(number);
  number++;
}
Now number increases each time. Eventually it becomes 6. Then number <= 5 becomes false, and the loop stops.
Beginner rule: Always make sure something changes so the loop can eventually stop.
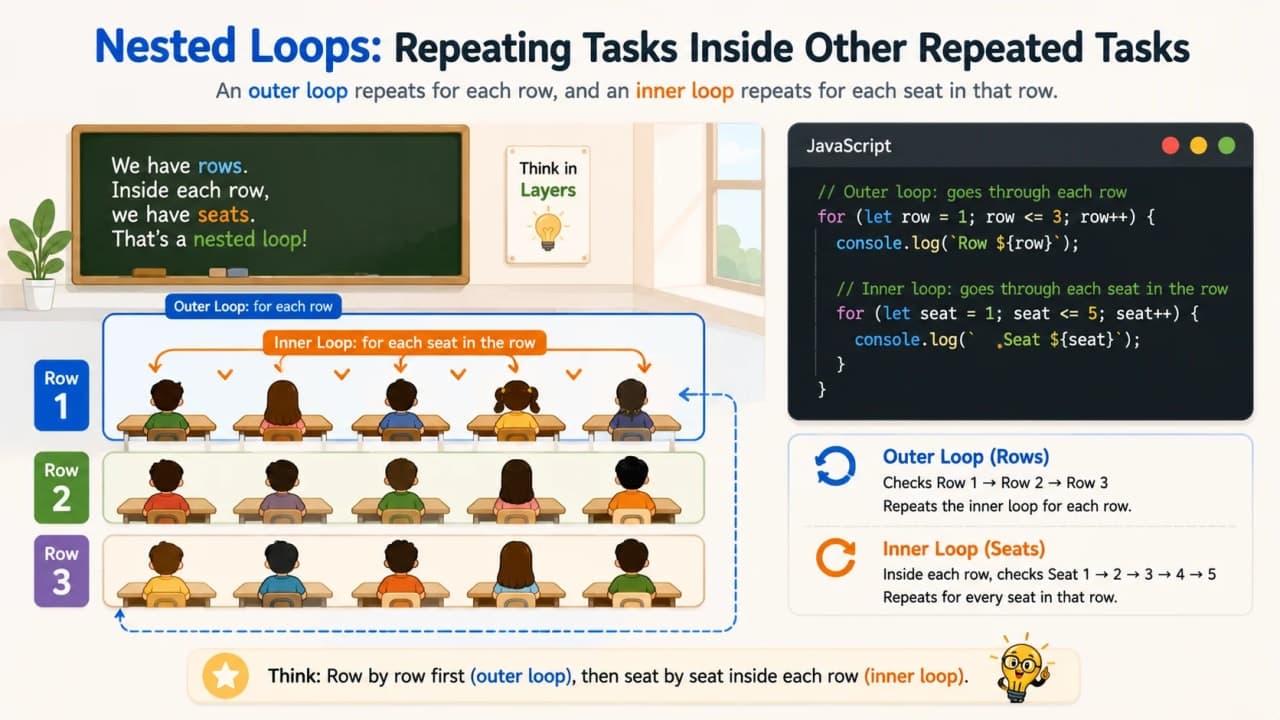
Nested Loops: A Loop Inside Another Loop
A nested loop means one loop inside another loop. This sounds advanced, but the idea can be simple if we use the right picture.
Imagine a classroom. It has rows. Each row has seats. First, you check a row. Then inside that row, you check each seat. After finishing all seats in one row, you move to the next row.
for (let row = 1; row <= 3; row++) {
  for (let seat = 1; seat <= 4; seat++) {
    console.log("Row", row, "Seat", seat);
  }
}
The outer loop handles rows. The inner loop handles seats. For each row, the seat loop runs fully.
Do not worry if nested loops feel a little heavy at first. Just remember the classroom idea: one repeated task exists inside another repeated task.
Common Beginner Mistakes With Loops
Loops are powerful, but small mistakes can change everything. Here are the common ones to watch for.
1. Forgetting to increase the counter
If the counter never changes, the loop may never stop. This is one of the easiest ways to create an infinite loop.
2. Using the wrong stop condition
If your loop should stop at 5 but the condition allows it to continue, you may get extra output or wrong results.
3. Starting from 1 when an array starts from 0
Arrays in JavaScript start at position 0. If you start from 1, you skip the first item.
const names = ["Asha", "Ravi", "Meera"];

for (let i = 1; i < names.length; i++) {
  console.log(names[i]);
}
This skips Asha because Asha is at position 0.
4. Confusing < and <=
count < 5 means stop before 5. count <= 5 means include 5. This small difference matters.
5. Putting too much logic inside one loop
If a loop is doing ten different things, it becomes difficult to understand. Keep loops simple when you are learning.
6. Not understanding when the loop stops
Before running the code, try saying the loop out loud: it starts here, stops here, and moves like this. This habit saves many bugs.
How to Think About Loops Like a Developer
Before writing a loop, do not jump directly into code. Ask five small questions.
What task do I want to repeat?
Where should it start?
When should it stop?
What should change after every round?
What should happen inside each round?
Let us use the simple task of printing numbers from 1 to 5.
The task is printing a number.
It starts from 1.
It stops at 5.
The number increases by 1 each time.
Inside each round, we print the current number.
Now these thoughts become code.
for (let number = 1; number <= 5; number++) {
  console.log(number);
}
This is the real skill. The loop syntax is only the final shape. The main work is understanding the repeated task clearly.
Where This Fits in Your JavaScript Journey
If you have been following the JavaScript for Beginners series, loops come naturally after variables, data types, operators, and conditions. Variables help you store values. Data types help you understand what kind of value you are working with. Operators help you compare and calculate. Conditions help your code make decisions. Loops help your code repeat work without becoming messy.
That is why loops are a big step. They make your code feel more alive. Instead of writing one instruction once, you can now tell JavaScript to keep working through a task.
Final Thoughts
Loops may feel confusing at first because they move in circles. But once you understand start, stop, and step, they become much easier.
Open the browser console. Try small loops. Break them. Fix them. Change the numbers. Loop through small lists. See what happens when you change < to <=. See what happens when you forget number++. That practical messing around is how loops become clear.
After loops, the next important topic is arrays, because arrays and loops often work together. Once you understand arrays properly, many JavaScript examples will start making much more sense.
Lock in the takeaway
Frequently asked questions
What is a loop in JavaScript?
A loop is a way to repeat a block of code multiple times until a condition says the loop should stop.
Which loop should beginners learn first?
Start with the for loop because it clearly shows where the loop starts, when it stops, and how it moves forward.
What is the difference between for and while loops?
Use for when you usually know how many times to repeat. Use while when you want to repeat until a condition changes.
What causes an infinite loop?
An infinite loop happens when the stopping condition never becomes false, usually because the value being checked never changes.
Why do arrays often start loops from 0?
JavaScript arrays start at index 0, so loops that read arrays usually start from 0 to include the first item.